I love jam! I love everything about it. The piles of beautiful, fresh fruit. The sweet smell in the kitchen. The colorful jars lined up on the counter when you’re finished.
Most people think of jam as strictly a summertime ritual, but jam can be made anytime of year.
I wasn’t always a jam maker, nor was my mother. However, we both discovered homemade jam later in life – and boy – am I glad we did! She really sparked my interest in preserving, but it was working with the bounty of delicious organic produce from South Coast Farms in San Juan Capistrano, CA that really got me jamming on my obsession. South Coast Farms grows many delightful things, but it’s their strawberries that they’re famous for. We’ve used their strawberries for our housemade jam at my restaurant Avanti Café in Costa Mesa, CA for years. People clamor year-round for the strawberry jam…it’s that good! It also couldn’t be simpler to make.
Our jam is not really based on a recipe. It’s more of a ratio and a technique that’s easy to learn. Most traditional jam recipes call for twice as much sugar to fruit. Think about that… that would be 2 POUNDS of sugar for 1 pound of fruit!!!! That’s a completely unnecessary quantity and that would only give you a few jars of jam. That much sugar is obviously unhealthy and also masks the flavor of the fruit that you are using. Your jam would never taste like strawberries; it would only taste sweet. So, what’s different about our jam you ask? First, we use half as much sugar as fruit to make ours. You’ll still get a good jam consistency and longevity, but your jam will actually tastes fresh and look bright red like strawberries. Another important thing to consider is using organic fruits whenever making jam. This is a good rule of thumb in general, but especially important when using strawberries. Strawberries are on the list of the Dirty Dozen for pesticide contamination.
How to Make Your Own Healthy Strawberry Jam at Home
You’ll need:
- 2 lbs organic strawberries
- 1 lb organic cane sugar
- juice of lemon
- ¼ t. neutral oil such as grapeseed or safflower
- generous pinch of salt
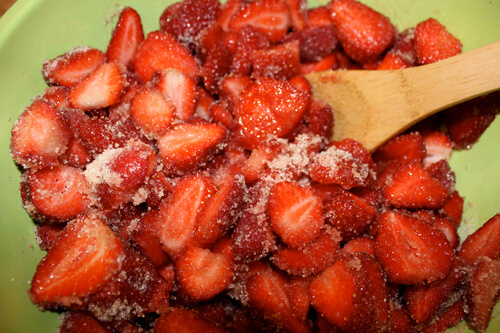
1.) First, get those strawberries washed and remove the stems. Thickly slice them and toss them with the sugar and lemon juice. Put them in a bowl and let them sit at room temperature for a few hours. They will get very juicy and syrupy. Stir them every now and then to help dissolve the sugar.
2.) Next, refrigerate them overnight.
3.) The following morning drain them in a colander or strainer over a large deep bowl. You want to save all of the delicious syrup that comes off; don’t waste a drop, that’s liquid gold! Let them drain for a while; you want to really separate the strawberries from their juice. You could easily let it go for a couple of hours.
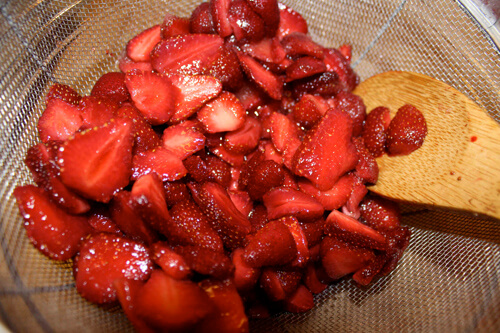
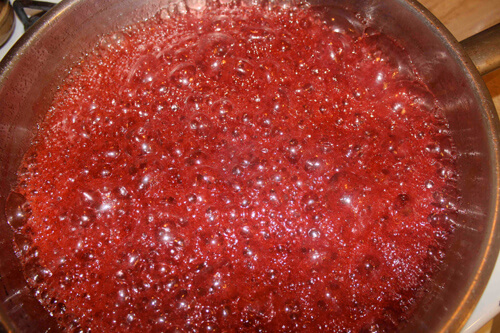
4.) When the strawberries are fully drained, pour the juice into the biggest, widest skillet or sauce pan you have. The bigger the better. This allows for maximum evaporation when cooking the juice and also prevents boil over. Crank up the flame to high and bring the juice to a boil. Add the oil at this point -sometime when boiling fruit gets a little foamy; this will help keep your syrup clear. You’re going to let it boil until it starts to thicken and forms big slow bubbles on top. Your juice will reduce by about half and coat a spoon nicely.
5.) Next, add your strawberries and the salt. Be very careful when adding the strawberries to the syrup. It’s extremely hot and can seriously burn, so go slow. Don’t just dump them in.
6.) Keep your flame on high and continue cooking the strawberries and syrup for another 5-7 minutes. Stir it every couple of minutes, scraping the bottom of the pan so it doesn’t stick. Remember to be careful- it’s still very hot! The whole mass will start to thicken and the strawberry pieces will look like they are breaking down some. When you think your close, turn it off. The jam will continue to cook a little afterwards.
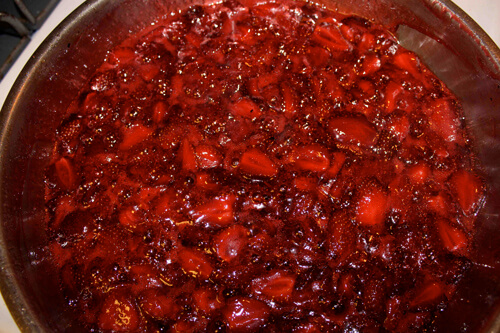
7.) You’re done!
You now have some mighty fine strawberry jam. Wait ‘till it cools before storing. If you are so inclined you can put the jam in a jar and process it to make it shelf stable (I won’t get into that in this post). It’s a pretty simple process, but it does require some equipment. I usually just put it in a jar and place it in the fridge. It will last at least a couple of months this way. In my family, we usually eat it up long before it goes bad.
This ratio and technique will work for most fruits – especially pears, apricots, peaches, and plums. It’s always best to make your jam in small batches. This will ensure fresh flavor and beautiful color. Most home cooks don’t have the equipment or BTU’s to cook large quantities.
It’s that simple! You’ve got no excuses now to make jam every week during the seasons and even gift to friends or loved ones. P.S. Got a favorite jam recipe or flavor? Let us know in the comments below and…happy jamming!


Can I use coconut oil instead of more processed grape seed or safflower oils. thank you
Hi Daneen
I don’t like to use coconut oil in jam because it
becomes solid at room temperature or when it’s chilled
and gives it a weird grainy texture. You can omit the oil all together if you skim off the foamy bits while it’s boiling. Use a slotted spoonand carefully scoop it off the top of the boiling liquid. I use the oil when I’m feeling lazy.
Let me know how it turns out for you.
Enjoy!
I made some strawberry jam this weekend, and just wanted to let you know that it turned out delicious! I put less sugar in the concoction, it still tasted great and got good jam consistency.
Wonderful Silvia! Thanks so much for sharing w/ us! EnJOY 🙂
Can I use olive oil?